SSH Keys
SSH keys are a form of access credentials used to login securely from one computer to another. Functionally, SSH keys are nearly the same as passwords, but it’s more secure to log into a server with SSH keys than passwords alone. While new Hivelocity servers do have a root password assigned, it is removed from the portal after 7 days. It is recommended you deploy new servers with a SSH key.
SSH public and private keys are generated on your personal machine. When you place your public key on your Hivelocity server, you can connect to it from the personal machine containing the private key.
Creating an SSH Key
# How to Set up SSH Keys
### Create the RSA Key Pair

```bash
ssh-keygen -t rsa
```
### Store the Keys and Passphrase
Once you have entered the Gen Key command, you will get a few more questions:

```bash
Enter file in which to save the key (/home/demo/.ssh/id_rsa):
```
You can press enter here, saving the file to the user home (in this case, my example user is called demo).

```bash
Enter passphrase (empty for no passphrase):
```
It's up to you whether you want to use a passphrase.

Entering a passphrase does have its benefits: the security of a key, no matter how encrypted, still depends on the fact that it is not visible to anyone else. Should a passphrase-protected private key fall into an unauthorized users possession, they will be unable to log in to its associated accounts until they figure out the passphrase, buying the hacked user some extra time. The only downside, of course, to having a passphrase, is then having to type it in each time you use the Key Pair.

The entire key generation process looks like this:

```bash
ssh-keygen -t rsa
Generating public/private rsa key pair.
Enter file in which to save the key (/home/demo/.ssh/id_rsa):
Enter passphrase (empty for no passphrase):
Enter same passphrase again:
Your identification has been saved in /home/demo/.ssh/id_rsa.
Your public key has been saved in /home/demo/.ssh/id_rsa.pub.
The key fingerprint is:
4a:dd:0a:c6:35:4e:3f:ed:27:38:8c:74:44:4d:93:67 demo@a
The key's randomart image is:
+--[ RSA 2048]----+
|          .oo.   |
|         .  o.E  |
|        + .  o   |
|     . = = .     |
|      = S = .    |
|     o + = +     |
|      . o + o .  |
|           . o   |
|                 |
+-----------------+
```
The public key is now located in /home/demo/.ssh/id_rsa.pub

The private key (identification) is now located in /home/demo/.ssh/id_rsa

### Copy the Public Key
Once the key pair is generated, it's time to place the public key on the virtual server that we want to use.

You can copy the public key into the new machine's authorized_keys file with the ssh-copy-id command. Make sure
to replace the example username and IP address below.

```
ssh-copy-id [email protected]
```
Alternatively, you can paste in the keys using SSH:

```
cat ~/.ssh/id_rsa.pub | ssh [email protected] "cat >> ~/.ssh/authorized_keys"
```
No matter which command you chose, you should see something like:

```
The authenticity of host '12.34.56.78 (12.34.56.78)' can't be established.
RSA key fingerprint is b1:2d:33:67:ce:35:4d:5f:f3:a8:cd:c0:c4:48:86:12.
Are you sure you want to continue connecting (yes/no)? yes
Warning: Permanently added '12.34.56.78' (RSA) to the list of known hosts.
[email protected]'s password:
```

Now try logging into the machine, with:

```
ssh [email protected]
```
and check in:

```
~/.ssh/authorized_keys
```
to make sure we haven't added extra keys that you weren't expecting.

Now you can go ahead and log into [email protected] and you will not be prompted for a password. However, if you set a passphrase, you will be asked to enter the passphrase at that time (and whenever else you log in in the future).

### Disable the Password for Root Login

Once you have copied your SSH keys unto your server and ensured that you can log in with the SSH keys alone, you can go ahead and restrict the root login to only be permitted via SSH keys.

In order to do this, open up the SSH config file:

```
sudo nano /etc/ssh/sshd_config
```
Within that file, find the line that includes PermitRootLogin and modify it to ensure that users can only connect with their SSH key:

```
PermitRootLogin without-password
```
Put the changes into effect:

```
sudo /etc/init.d/ssh restart
```
Managing SSH Keys
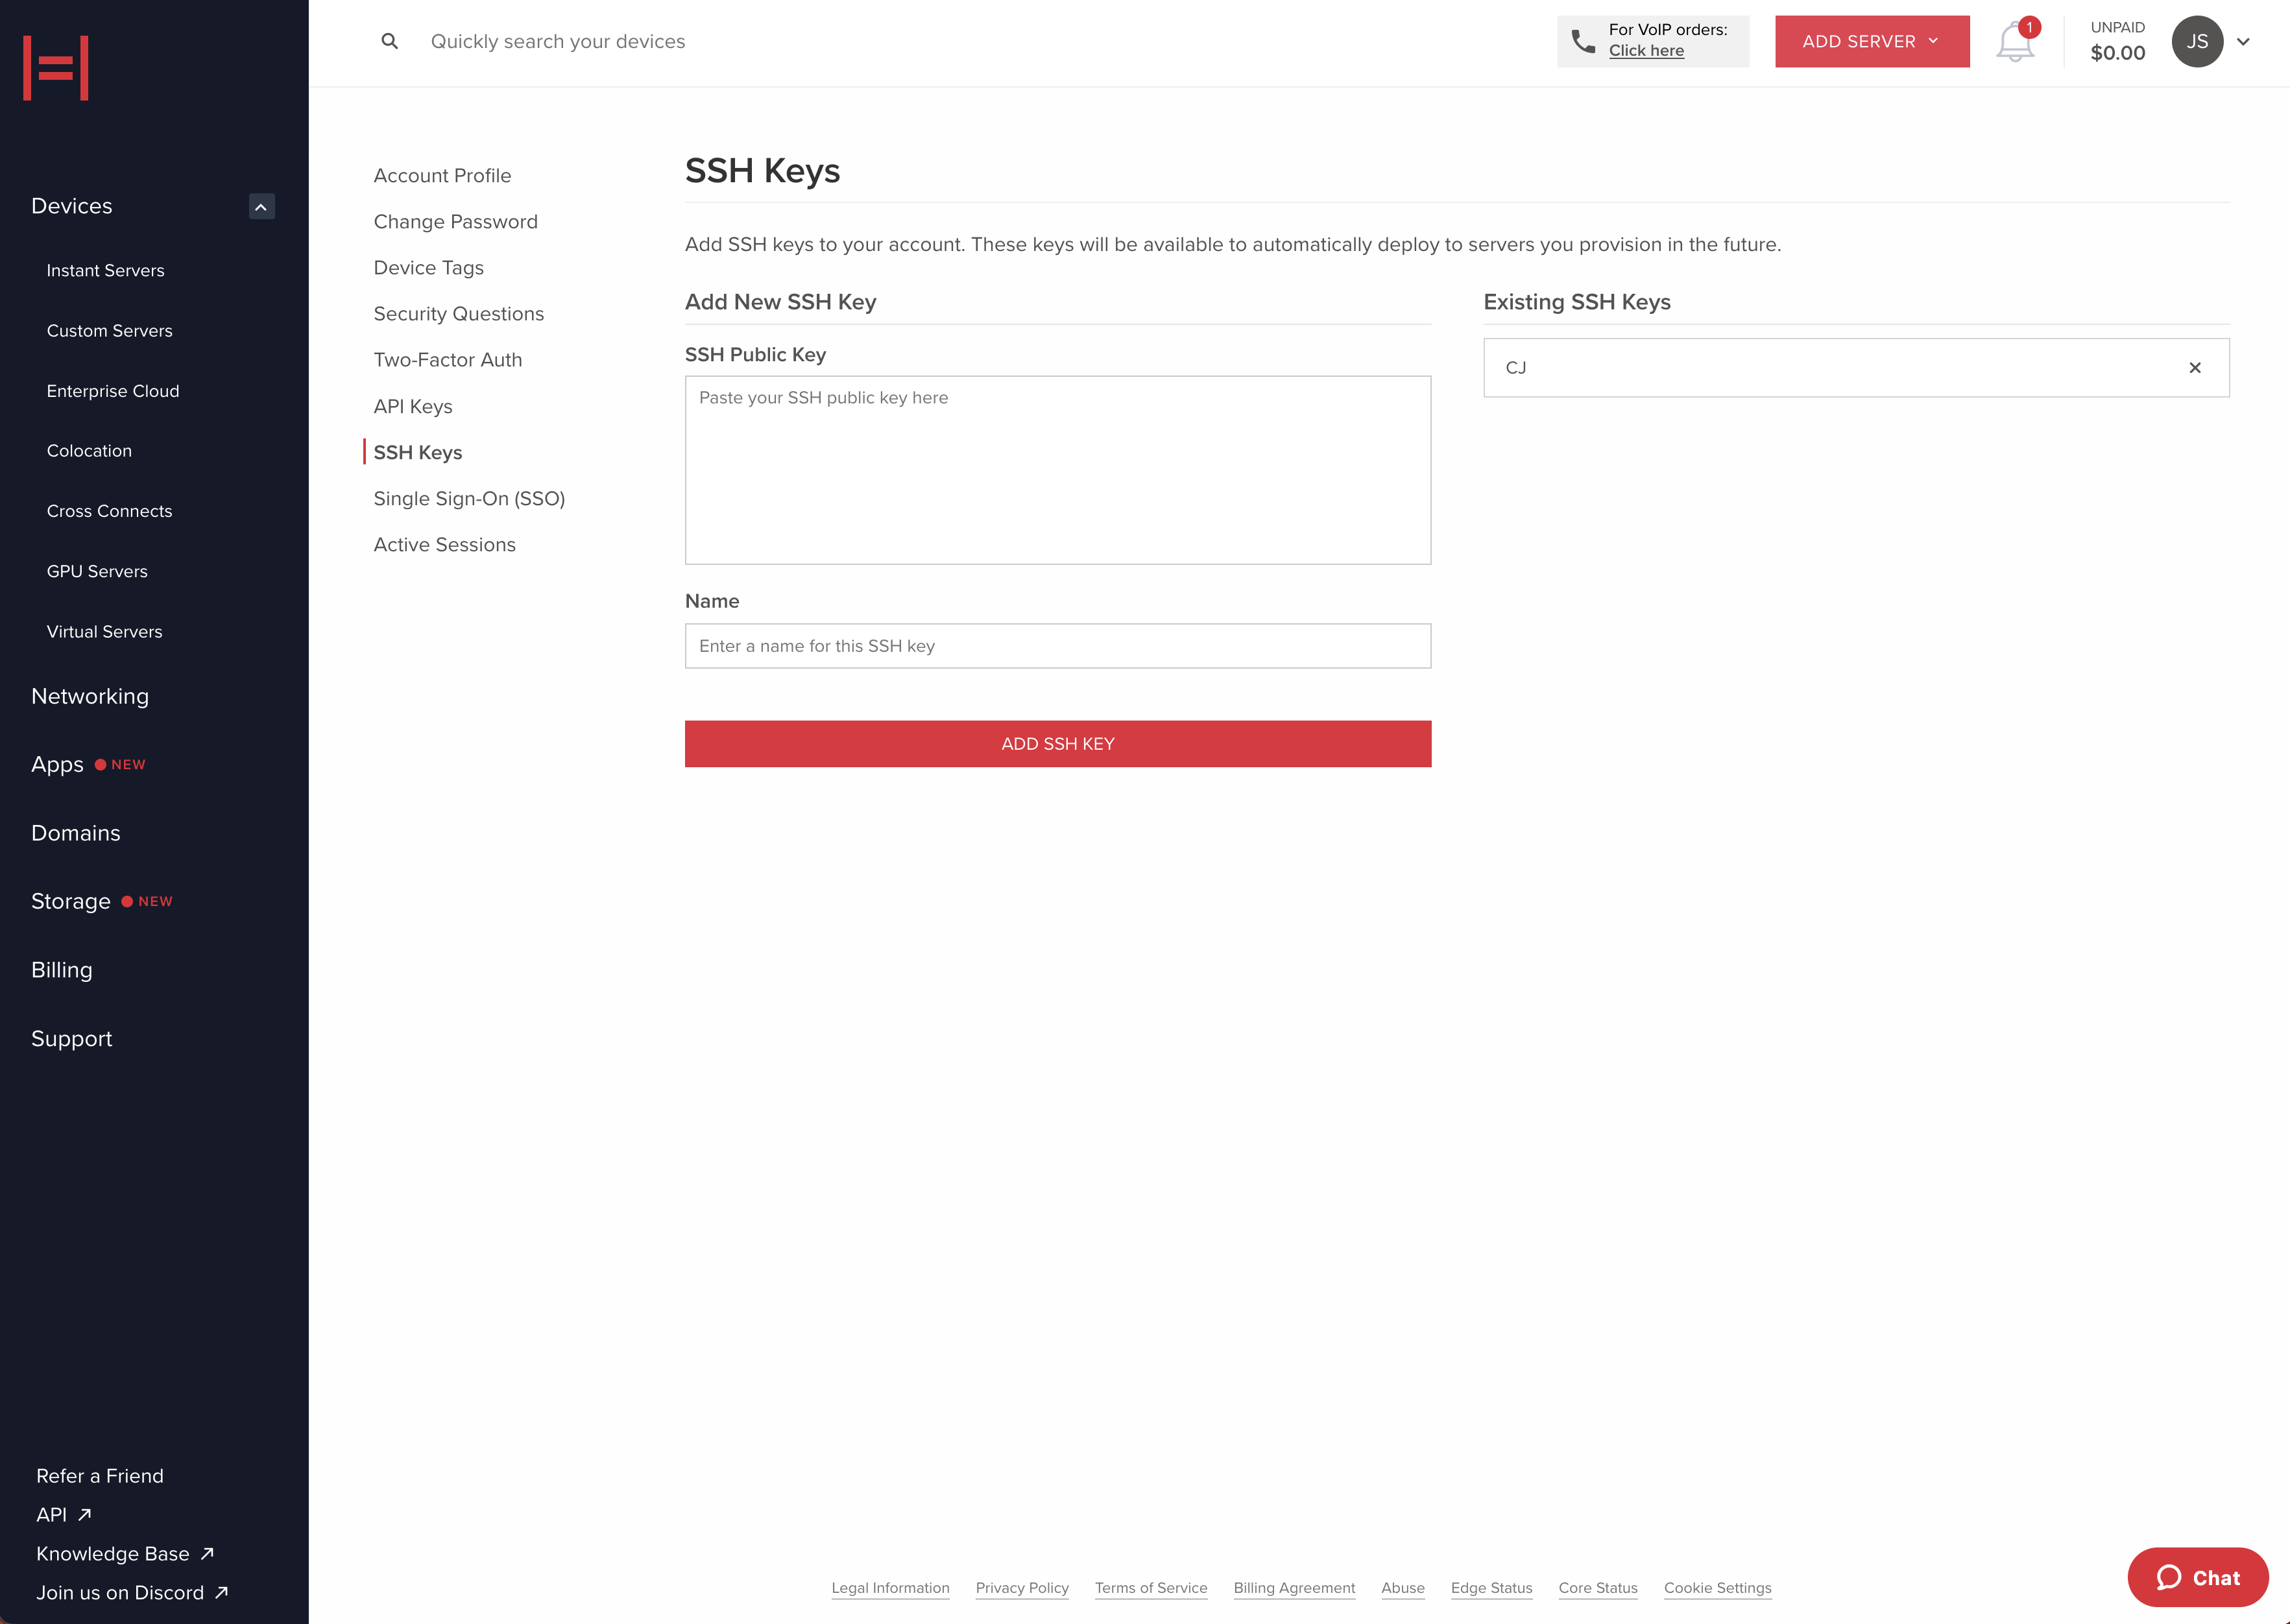
All SSH Keys are added to the clientaccount and available to everyone in the account for deployments. Once you have an SSH key pair on your local machine, you can add it to your client account. To add a new SSH Key in your portal, navigate to Settings > SSH Keys.
You can also upload your SSH key using a POST request to /ssh_key.
curl -X 'POST' \
  'https://core.hivelocity.net/api/v2/ssh_key/' \
  -H 'accept: application/json' \
  -H "X-API-KEY: $API_KEY" \
  -H 'Content-Type: application/json'
  -d '{
  "publicKey": "$YOUR_PUBLIC_KEY",
  "name": "Johns Macbook"
}'
Retrieve a list of available API Keys from the api with a GET request to /ssh_key
curl -X 'GET' \
  'https://core.hivelocity.net/api/v2/ssh_key/' \
  -H 'accept: application/json' \
  -H "X-API-KEY: $API_KEY"
Using your SSH Key
At deployment time, we use a post install script to add the specified SSH Key(s) to the authorized_users directory of your server. As soon as your server deploys, you can access it over SSH. This is the only time SSH Keys are automatically added to your server. If you wish to modify the SSH Keys on your server and have lost access, you must access the server using the IPMI Console and update the keys manually.
Updated 10 months ago